
Baking homemade sourdough has been on my culinary bucket list for some time now. I attempted it on my own a few years ago but after my first two loaves came out looking like baseballs I let my starter starve to death and took up another hobby––blogging.
Luckily blogging turned out to be a pretty great backup plan, but moving to the motherland of good sourdough last year gave me the perfect excuse to give it another go. You seen, here in San Francisco there are legit sourdough starter classes and dough development workshops. Not surprisingly, after my first attempt I felt compelled to take them both.
I realize there are bakers who dedicate their entire lives to mastering the art of artisan bread baking, but those two classes must have gotten me off to a solid start because here I am, six months later, writing a Homemade Sourdough Series. I never would have guessed that three years after that first bread debacle I’d be living in San Francisco blogging about baking sourdough, but here we are!
To kick off the series, today I’m sharing the 10 Essential Tools for Baking Homemade Sourdough. The first thing I learned about baking homemade artisan sourdough is how important it is to have the right equipment. Chances are you already have most of these tools in your kitchen but if not, don’t worry. Any you don’t have can easily be found online.

Let’s dive right in, shall we?
1. Small tubs for your sourdough starter. To start, you’ll need a couple of 2- to 4-cup tubs with lids for holding your sourdough starter (also called levain). I use an inexpensive, glass tupperware container works great for me and doesn’t take up much room in the refrigerator. Whichever container you choose, you’ll want to write the weight on the bottom with a Sharpie so there’s no need for it to be fancy.
2. Thick oven mitts. Those pots are heavy and get extremely hot so make sure your oven mitts can handle grabbing onto a 500F dutch oven.
3. Deep tub for mixing dough. A 6-12 quart tub is ideal for mixing and folding your dough, and to hold the dough when it rises. It seems big but you’ll need the room, I promise. I use the 12-quart version of this one, but whichever one you choose make sure it’s food grade and get one with a lid if possible. Generally, round mixing tubs are best since there are no corners for the ingredients to get trapped in. If you already have a similar sized container at home (about 8 inches in diameter and 10 inches deep with a lid) give it a try.
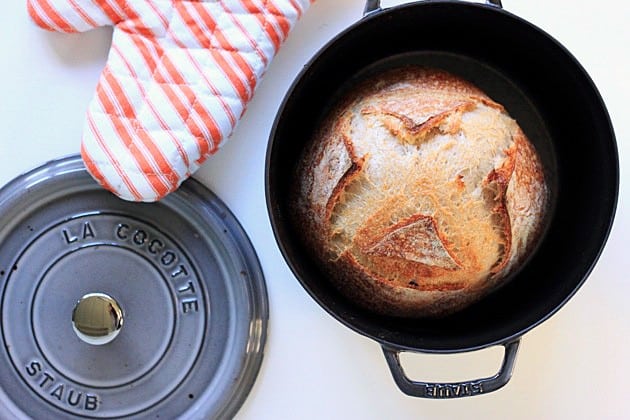
4. Cast Iron Dutch Oven. This can be the priciest piece of equipment you’ll need but it’s also the most versatile––and much more practical than having a huge bread maker on your kitchen counter. Baking bread in a preheated Dutch oven is what gives you that artisan-looking loaf. I have both a 4-quart and 7-quart which comes in handy when I’m baking 2 loaves at once, but you can certainly get by with just one 4-quart oven. Most dutch ovens are heat proof to 500F but keep in mind that some brands like Le Cruset have plastic knobs that might melt at high temperatures. If yours has a plastic knob just swap it out for a metal before you get started. If you’re not wanting to spend a whole lot of money, Lodge Cast Iron makes a high quality and much less expensive Dutch oven that works wonderfully.
5. Measuring cups. When it comes to ingredients, all of the measuring will be done using the food scale but you’ll need these to transfer ingredients from one container to the next. I’ve found keeping a measuring cup in my flour container saves time and makes less of a mess since it never touches water!
6. Digital Food Scale. It’s super important to measure bread ingredients by weight, not volume, so having a digital kitchen scale is essential. You’ll need one that measures in grams and has a display large enough to read it when there’s a big tub with flour on it. I bought this one for less than $30 and love it!
7. Instant-Read Probe Thermometer. A digital kitchen thermometer is important for making sure you’re using the right temperature water and measuring the final mix of ingredients. It’s also handy if you’re ever left wondering if your loaf is cooked. The inside of a fully cooked loaf will typically read between 210-212F.
8. Dough Scraper. Mine was $10 and has quickly become one of my favorite kitchen tools. It’s not only good for unsticking the dough from your countertop but also for picking up food scraps and doing a quick cleanup of the kitchen counter while prepping ingredients for a recipe.
9. Proofing Baskets. Proofing baskets hold shaped loaves as they undergo their final rise (also called proofing). I have two of these but have also heard that medium-sized bowls (about 9 inches in diameter) lined with a flour dusted tea towel can work well too.
10. Tea Towels. Finally, you’ll need something to cover your dough both while you’re stretching it (if you stretch it on the countertop) and after you have shaped the loaves. The tea towels from Ikea are my favorite because they’re light and really inexpensive!
If you want to bake along, start gathering your tools because in Part 2 of this series we’ll be getting our hands messy and making our own sourdough starters.
Here’s a little taste of what’s to come!
Sorry for the dumb question but can sourdough be made in a ceramic bread loaf pan instead of the round version? Like this one?
http://www.kingarthurflour.com/shop/items/covered-bread-loaf-baker
Based on the description it sounds like it’d to the trick. The key is trapping in the moisture for the first part of baking, and removing the lid halfway through to allow the exterior to brown and crisp up. Hope that helps!
Ok, when I get it I will let you know how it worked. :)
Never knew this kind of pot is called a Dutch oven. I’m Dutch, we just call it “iron pot” (but in Dutch, of course).
Oh, yum! I’ve been wanting to try out new recipes after I finish up school for the semester + this is added to the list!
addicted to sourdough. WANT to make my own. mail me some of your starter?! ;)
Sourdough bread is hands-down my absolute favorite kind of bread. I need to pick up a few of these things, but I’d love to try to make my own. Can’t wait for part 2.